If you have already prepared the perfect potting mix and planted your first seeds, you have laid a fantastic foundation for your organic kitchen garden. But to truly unlock the potential of your plants, you need to understand one fundamental truth of agriculture: you do not feed the plant; you feed the soil.
In modern chemical farming, synthetic fertilizers are dumped into the dirt, temporarily forcing the plant to grow while simultaneously killing the natural ecosystem beneath the surface. Traditional Indian farming takes a completely different, highly sustainable approach. Enter Jeevamrutham (also known as Jeevamrutha).
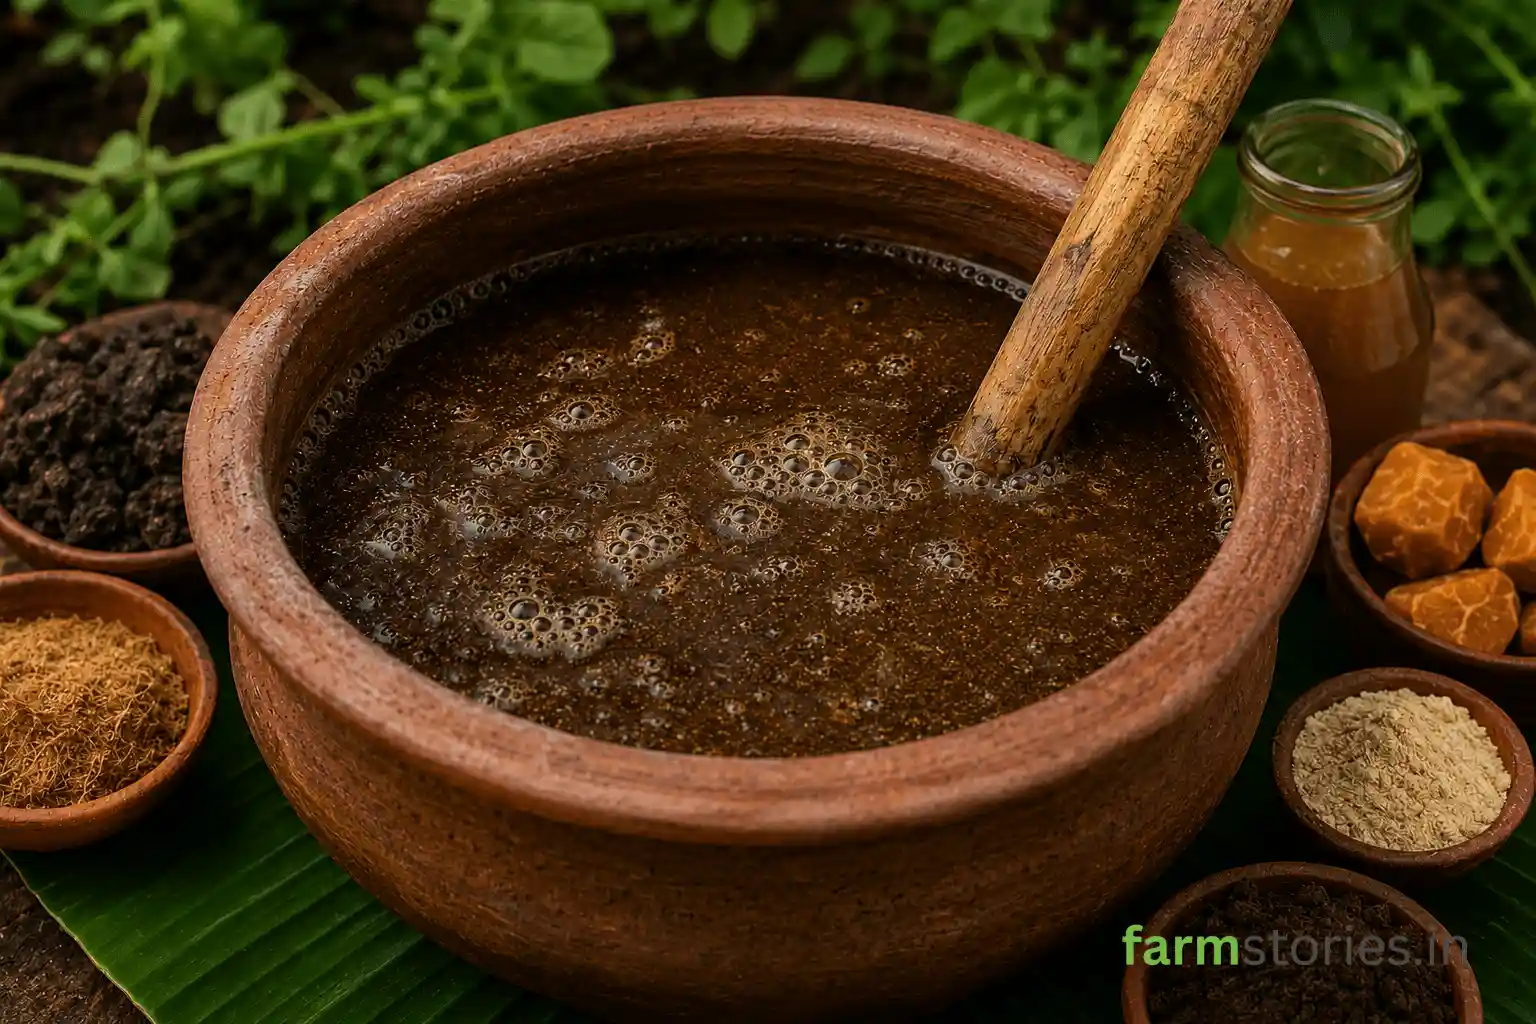
Translated directly as the “Elixir of Life,” Jeevamrutham is not just a fertilizer; it is a powerful microbial culture. When applied to your garden, it introduces billions of beneficial microorganisms that work tirelessly to break down organic matter and unlock hidden nutrients, making them easily absorbable by your plant’s roots.
In this comprehensive guide, we will bridge the gap between ancient heritage and modern soil science, teaching you exactly how to brew, scale, and apply this miraculous liquid fertilizer right in your own home or balcony garden.
what is Jeevamrutham – India’s Ancient Liquid Fertilizer
1. The Science Behind the Elixir: How Jeevamrutham Works
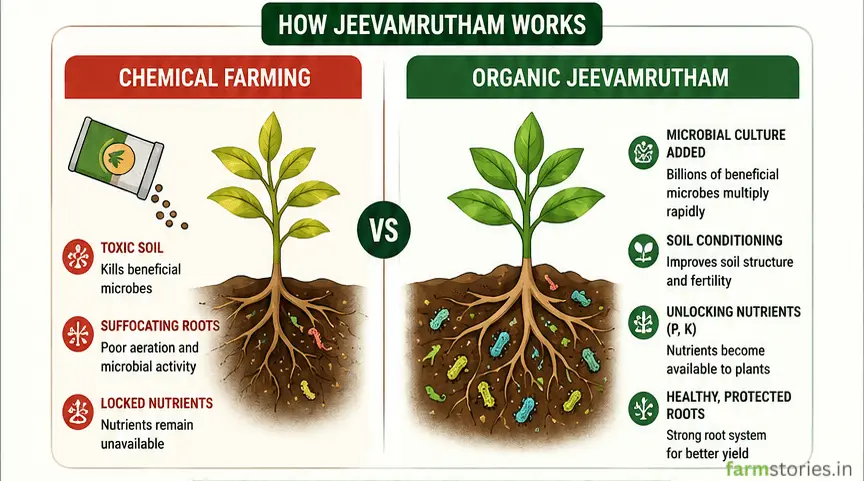
To understand why this brew is so effective, we have to look at the microscopic world. Even the most nutrient-rich soil contains locked-up minerals (like phosphorus and potassium) that a plant’s roots cannot absorb on their own. They need a middleman.
Beneficial soil bacteria and fungi act as this middleman. They consume the raw organic matter in the soil and excrete bio-available nutrients that the plant can drink up.
Jeevamrutham is essentially a breeding ground for these microbes. By combining specific raw ingredients, you create a hyper-active fermentation process. A single gram of cow dung contains millions of beneficial microbes. When placed in the Jeevamrutham mixture, these microbes multiply into the billions within just 48 hours. When you pour this liquid into your grow bags, you are introducing a massive, hungry workforce that immediately goes to work conditioning your soil and protecting your plants’ roots from pathogens.
how Jeevamrutham – India’s Ancient Liquid Fertilizer works
2. The Five Pillars: Understanding Your Ingredients
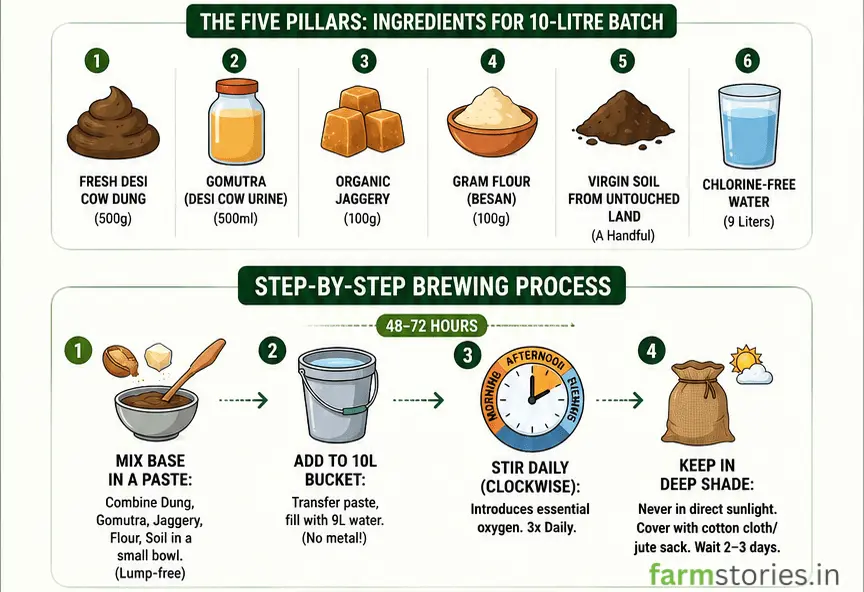
Traditional agricultural recipes call for mixing Jeevamrutham in massive 200-liter drums. However, for a home kitchen garden, we need to scale this down. To brew a highly effective 10-liter batch (perfect for balconies or terraces), you will need the following organic ingredients:
Join a community dedicated to sustainable cultivation. Subscribe to FarmStories below for free, authentic insights into modern agri-tech and organic farming methods.
1. Desi Cow Dung (Fresh): 500 Grams This is the starter culture. It must be fresh (not dried) and ideally sourced from an indigenous (Desi) Indian cow rather than a hybrid breed, as the gut flora of native cows contains a significantly higher concentration and diversity of beneficial agricultural microbes.
2. Desi Cow Urine (Gomutra): 500 ML Aged cow urine is a potent source of natural nitrogen, uric acid, and essential minerals. Furthermore, it acts as a natural pest deterrent and antifungal agent, keeping root rot and soil-borne diseases at bay.
3. Organic Jaggery (Gur): 100 Grams This is the carbon and energy source. The microbes in the cow dung need instant energy to begin multiplying rapidly. Old, dark, chemical-free jaggery works best. Never use refined white sugar, as the bleaching chemicals will kill the bacteria.
4. Gram Flour (Besan) or Any Pulses Flour: 100 Grams While jaggery provides carbon, the flour provides protein (amino acids). This combination of carbohydrates and proteins creates the perfect nutritional broth for explosive microbial multiplication.
5. Virgin Soil: A Handful This is the local activator. You need a handful of undisturbed soil from under a large tree (like a Banyan or Peepal) or from a thick forest area. This soil contains dormant, highly resilient local bacteria that will wake up and join the culture. Do not use potting soil from a nursery bag.
6. Water (Chlorine-Free): 9 Liters Tap water often contains chlorine, which is specifically designed to kill bacteria. If using tap water, let it sit in an open bucket for 24 hours so the chlorine can evaporate before you begin brewing.
Jeevamrutham – India’s Ancient Liquid Fertilizer brewing step by step process
3. The Step-by-Step Brewing Process
Brewing Jeevamrutham is a simple aerobic fermentation process. It requires shade, air, and a little bit of daily attention.
The Mixing Vessel: Choose a plastic, clay, or wooden bucket. Never use a metal container (like copper, iron, or steel), as the highly active microbes and the acidity of the urine will react with the metal and ruin the batch.
The Base Paste: In a small bowl, mix the cow dung, jaggery, gram flour, and the handful of virgin soil. Slowly add a little bit of the cow urine to create a thick, lump-free paste. Breaking all the lumps is crucial for an even fermentation.
The Dilution: Transfer this thick paste into your main 10-liter bucket. Pour in the remaining cow urine and the 9 liters of chlorine-free water.
The Stirring Technique: Using a wooden stick, stir the liquid vigorously in a clockwise direction for about two minutes. Stirring introduces oxygen, which these specific aerobic bacteria need to survive and multiply. Do not stir anti-clockwise, as this disrupts the vortex and the multiplication process.
Incubation: Cover the bucket with a porous cotton cloth or a jute sack to keep flies and mosquitoes out while still allowing the liquid to breathe. Keep the bucket in a deeply shaded area, completely away from direct sunlight or rain.
Daily Maintenance: You must stir the mixture with the wooden stick (clockwise) three times a day—morning, afternoon, and evening—for exactly 48 to 72 hours.
By the third day, the liquid will emit a strong, earthy, fermented odor, and you may see a frothy layer on top. Your Jeevamrutham is now biologically active and ready to use!
Jeevamrutham – India’s Ancient Liquid Fertilizer application and usage
4. Application: How to Feed Your Garden
Jeevamrutham is incredibly potent. Applying it directly without dilution can overwhelm young plants. Here is how to use it safely and effectively:
Method A: Soil Drenching (For Root Health and Growth)
Dilution: Mix 1 part Jeevamrutham with 10 parts of water (1:10 ratio).
Application: Pour this diluted mixture directly into the soil around the base of your plants. Ensure the soil is already slightly moist before applying; never pour fertilizer into bone-dry soil.
Frequency: Apply this every 15 days for heavy-feeding crops like chillies, tomatoes, and gourds, and every 21 days for leafy greens like spinach.
Dilution: If you want to spray it on the leaves, the dilution must be weaker. Mix 1 part Jeevamrutham with 20 parts of water (1:20 ratio).
Application: You must filter the liquid through a fine muslin cloth at least twice before putting it into a spray bottle, otherwise, the organic matter will permanently clog the nozzle. Spray the plants early in the morning or late in the evening.
Benefits: Plants can absorb nutrients through their stomata (pores on the leaves) much faster than through their roots. This spray acts as an immediate health booster and coats the leaves in a protective biological shield against fungal attacks like powdery mildew.
5. Storage and Shelf Life Warnings
One of the most critical things to understand about Jeevamrutham is that it is a living, breathing entity. It is not a chemical that can sit on a shelf for months.
Once the 72-hour brewing process is complete, the microbe population is at its absolute peak. From this point, you have a window of about 5 to 7 days to use the entire batch. If left longer, the microbes will consume all the jaggery and flour. Once their food source is depleted, they will begin to die off rapidly, and the mixture will putrefy and turn harmful.
Always brew exactly what you need for a week’s application, and pour any excess into your compost bin to accelerate the composting process.
Want to see these techniques in action? Join our growing community of urban farmers by following farmstories on Instagram, YouTube, and Facebook for daily tips, video guides, and harvest inspiration!