Drip Irrigation for Balcony and Terrace Gardens – If you are growing vegetables in containers or grow bags, you already know the biggest daily struggle: watering. During peak Indian summers, the soil in a black grow bag can dry out in a matter of hours. Missing just one watering session can cause your tomato blossoms to drop or your spinach to wilt beyond repair.
But what if your garden watered itself?
Welcome to the world of micro-drip irrigation. Once reserved for massive commercial farms, this technology has been downsized for the everyday urban gardener. Setting up a basic automated drip system is the single best investment you can make for your kitchen garden. It saves time, drastically reduces water waste, and results in significantly healthier plants.
Here is everything you need to know to set up your first balcony drip irrigation system.
How Drip Irrigation for Balcony Works
Traditional watering with a hose or a can floods the top of the soil. This leads to heavy evaporation, soil compaction, and nutrient runoff.
Join a community dedicated to sustainable cultivation. Subscribe to FarmStories below for free, authentic insights into modern agri-tech and organic farming methods.
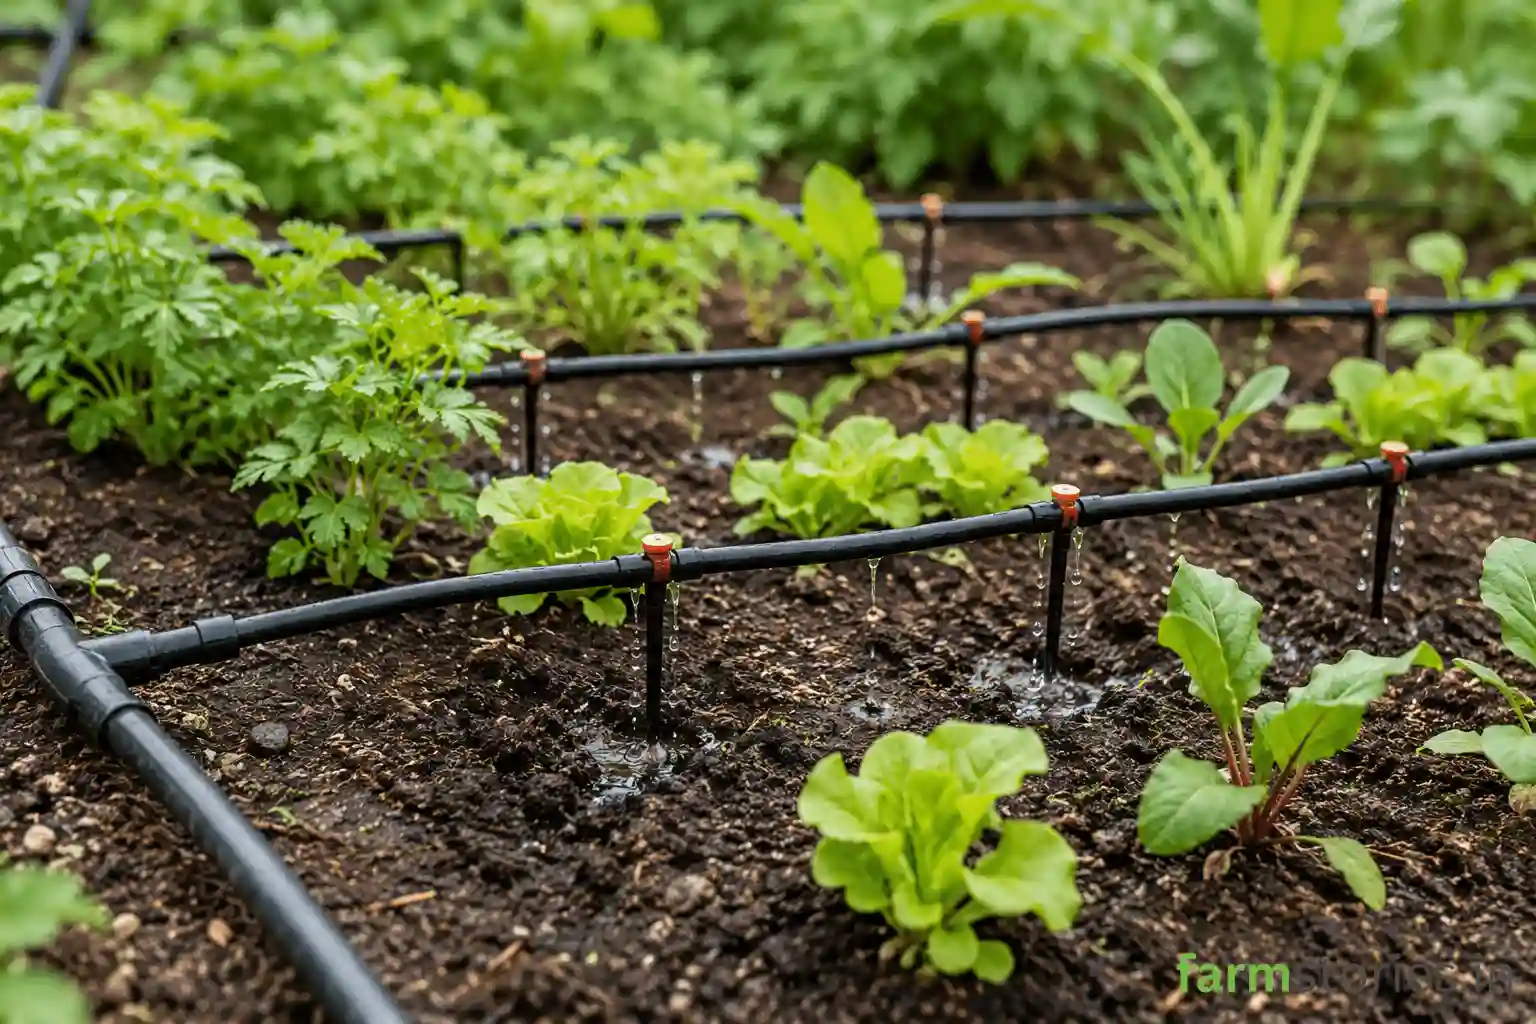
A drip system works completely differently. A network of thin plastic tubes delivers water directly to the base of each plant, releasing it slowly, drop by drop. This allows the water to soak deeply into the root zone without evaporating or splashing soil (which often carries fungal diseases) onto your plant’s leaves.
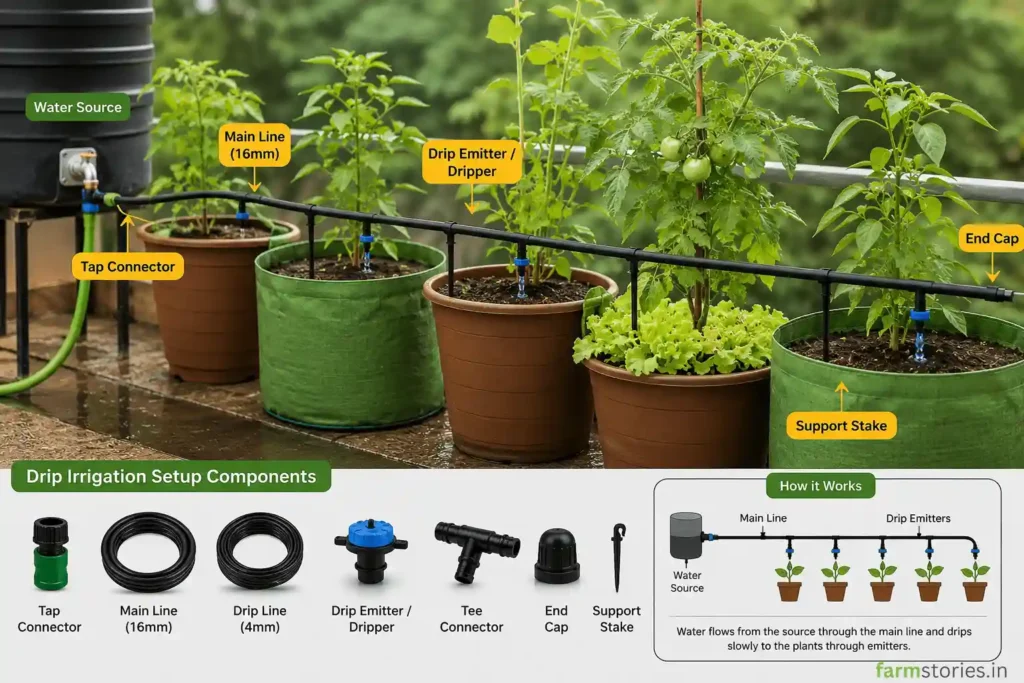
The 4 Essential Components of Drip Irrigation for Balcony
You do not need an engineering degree to set this up. Most online retailers sell complete “Balcony Drip Irrigation Kits” that come with all the necessary parts. A standard kit includes:
The Main Supply Line (16mm Pipe): This is the thick black tube that connects directly to your water tap and acts as the highway carrying water to your garden area.
Feeder Lines (4mm Tube): These are the smaller, flexible tubes that branch off the main line and go directly into your individual grow bags or pots.
Emitters (Drippers): These sit at the very end of the 4mm tubes. They control the flow of water. Look for adjustable emitters so you can give a heavy-feeding chilli plant more water than a small pot of herbs.
Connectors and Punches: Small plastic T-joints and a hole-punch tool used to connect the thin tubes to the thick main line.
Pro-Tip: If you want true automation, add a Water Timer. This battery-operated device attaches directly to your tap and automatically turns the water on and off at whatever times you set.
drip irrigation for balcony setup step bystep guide
Drip Irrigation for Balcony: Step-by-Step Setup Guide
Setting up a basic kit Drip Irrigation for Balcony for 15-20 plants takes less than an hour.
Step 1: Lay the Main Line. Connect the 16mm pipe to your tap and run it along the floor behind your pots. Cap the very end of the pipe so water doesn’t rush out.
Step 2: Punch the Holes. Using the provided tool, punch a small hole in the main line directly behind each grow bag you want to water.
Step 3: Connect the Feeder Lines. Insert a small plastic connector into the hole you just punched. Attach a piece of the 4mm tubing to it, making sure it is long enough to reach the center of your plant’s pot.
Step 4: Attach the Emitters. Push an adjustable emitter onto the end of the 4mm tube and stick the support peg deep into the soil near the plant’s roots.
Step 5: Test and Adjust. Turn on your tap slowly. Walk down the line and adjust the cap on each emitter. Twist it open for a faster drip, or tighten it for a slower one.
The Benefits of Upgrading
Once your system is running, the benefits are immediate. Because the water goes directly to the roots, weed growth drops by almost 80%. Your plants will suffer far less heat stress, leading to a much higher yield of vegetables. And most importantly? You can finally take a weekend vacation without begging your neighbors to water your plants!
Want to see these techniques in action? Join our growing community of urban farmers by following farmstories on LinkedIn, Instagram, YouTube, and Facebook for daily tips, video guides, and harvest inspiration!


")
